Unlock the Secret to Perfect Thumbprint Cookies: No More Spreading Thin!
Few cookies evoke such a warm, nostalgic feeling as the classic thumbprint cookie. With their tender, buttery base and a sweet, vibrant dollop of jam or curd in the center, they're a staple for holiday platters, bake sales, and cozy afternoon treats. While the concept of a thumbprint cookie recipe seems straightforward, many home bakers face a common, frustrating challenge: cookies that spread too thin, losing their charming shape and becoming flat, brittle discs. If you've ever pulled a sheet of sad, shapeless cookies from the oven, wondering what went wrong, you're in the right place!
This comprehensive guide will not only walk you through crafting a delicious thumbprint cookie but, more importantly, equip you with expert tips and tricks to prevent spreading, ensuring every cookie emerges perfectly round, soft, and ready to impress. Get ready to master the art of the perfect thumbprint!
The Foundation of Flavor: Crafting Your Perfect Thumbprint Cookie Dough
Every great cookie starts with a phenomenal dough. For thumbprint cookies, we're aiming for a dough that's rich in flavor yet robust enough to hold its shape. Our foundational thumbprint cookie recipe calls for a blend of simple, high-quality ingredients that come together to create that quintessential buttery goodness.
- Unsalted Butter: This is the heart of your cookie. Using unsalted butter allows you to control the exact amount of salt in your recipe, balancing the sweetness perfectly.
- Granulated Sugar: Provides sweetness and contributes to the cookie's tender texture.
- Egg: Acts as a binder, adding structure and richness.
- Vanilla Extract: Essential for that warm, inviting aroma and flavor. Consider trying a homemade vanilla extract for an extra special touch!
- All-Purpose Flour: The primary structural component.
- Baking Powder: A leavening agent that gives the cookies a slight lift and contributes to their soft texture.
- Salt: Enhances all the other flavors, preventing the cookies from tasting bland.
Mixing Mastery: The First Step to Preventing Spread
The way you handle your ingredients, particularly the butter, is paramount to preventing your cookies from spreading thin. Here's how to ensure your dough sets you up for success:
- Butter Temperature is Non-Negotiable: This is perhaps the most critical tip! Your unsalted butter should be softened, but still cool to the touch – never overly soft, greasy, or melted. If the butter is too warm when incorporated, it will cause the cookies to spread excessively as it melts quickly in the oven. Aim for a temperature around 65-67°F (18-19°C). If you press your finger into it, it should leave an indentation, but not easily push all the way through.
- Creaming Butter and Sugar: In a large mixing bowl, whip the softened butter and granulated sugar together using a handheld or stand mixer. Beat until the mixture is light, fluffy, and pale in color. This process incorporates air, which contributes to the cookie's texture.
- Adding Wet Ingredients: Beat in the egg and vanilla extract until well combined, scraping down the sides of the bowl as needed.
- Incorporating Dry Ingredients: In a separate bowl, whisk together the all-purpose flour, baking powder, and salt. Then, gradually add the dry mixture to the wet ingredients. Mix just until combined. Overmixing the flour can develop the gluten too much, leading to tough, dense cookies.
- Proper Flour Measurement: For accurate results, always scoop your flour into the measuring cup with a spoon, then level it off with a flat surface, such as the back of a knife. Never scoop directly from the bag, as this compacts the flour and can result in using too much.
Mastering the Shape: Preventing Spreading and Cracks
Once your dough is perfectly mixed, the next crucial steps involve shaping and indenting. This stage is where many bakers inadvertently contribute to the thin-spreading issue. Follow these guidelines for perfectly formed cookies every time.
Prepare your baking sheet with parchment paper. Parchment paper not only prevents sticking but also helps insulate the bottom of the cookies, promoting even baking.
The Art of the Roll and Indentation
- Uniform Dough Balls: Scoop about 1 tablespoon of dough for each cookie. A cookie scoop can be invaluable for ensuring consistent size, which leads to even baking. Roll each portion into a smooth, tight ball between the palms of your hands.
- The Sugar Coat: Gently roll each dough ball in granulated sugar. This adds a delightful sparkle, a hint of crunch, and can even help create a barrier that slightly deters spreading.
- Strategic Placement: Place the sugared dough balls onto your prepared cookie sheet, leaving about 1 to 2 inches between cookies to allow for slight expansion without merging.
- The Gentle Thumbprint: This is where many cookies go awry.
- Not Too Deep: Using the back of a round teaspoon, your thumb, or even a small, rounded dowel, gently press into the middle of each cookie to create a shallow well. The key is gentle pressure.
- Avoid Flattening: Do not push so deeply that you flatten the entire cookie or push through to the bottom. If you make the indentation too deep or push too hard, you'll compromise the cookie's structure before it even bakes, causing it to flatten out during baking. A shallow indentation is all you need; the filling will settle beautifully into it.
- Consider Chilling (Optional, but Effective): If your kitchen is warm or if you've been handling the dough for a while, a quick chill can work wonders. Place the formed, indented cookie balls (without filling yet) on the baking sheet into the refrigerator for 10-15 minutes before adding the filling and baking. This firms up the butter in the dough, providing extra insurance against spreading.
The Art of Filling and Baking
Now for the fun part: adding the delicious center! The filling is not just for flavor; its quantity and timing are also vital to maintaining your cookie's perfect shape.
Choosing and Applying Your Filling
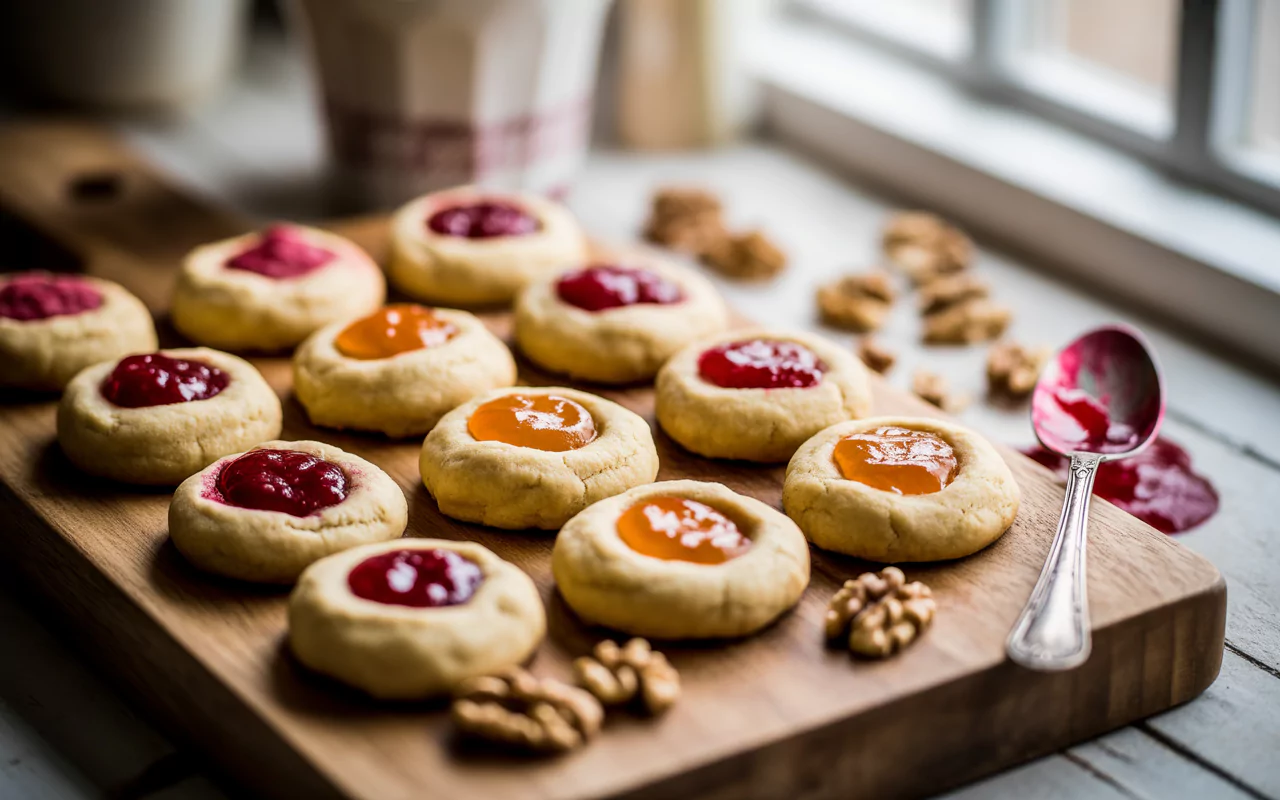
The beauty of the thumbprint cookie recipe lies in its versatility when it comes to fillings. While classic jams are popular, the possibilities are endless:
- Jams & Preserves: Raspberry, apricot, strawberry, blueberry, and cherry are all fantastic choices. Opt for fruit preserves with a thicker consistency if possible.
- Lilikoi Butter: For a truly unique and delightful twist, consider lilikoi (passion fruit) butter. Its slightly tart yet sweet, smooth, and rich profile is a game-changer. You can find ready-made lilikoi butter or, for an extra special touch, make your own from scratch. If you're eager to try this tropical delight, check out our guide to Easy Lilikoi Butter Thumbprint Cookies: A Classic Treat.
- Curds: Lemon, lime, or orange curds offer a bright, tangy contrast to the buttery cookie.
- Nut Butters & Chocolates: A dollop of Nutella, peanut butter (plain or mixed with powdered sugar), or even a small piece of chocolate can be baked into the center.
Filling Quantity is Key
No matter your choice, the rule remains the same: do not overfill! Adding too much filling, especially if it's very moist or heavy, will weigh down the cookie and cause it to flatten out excessively during baking. Aim for no more than 1 teaspoon of filling per cookie. A small, round teaspoon or even a piping bag can help you get the perfect amount into each well.
Baking for Perfection
- Preheat Oven: Preheat your oven to 350°F (175°C). An accurately preheated oven is crucial for consistent baking.
- Bake Time: Bake the cookies for approximately 15 minutes, or until the edges are lightly golden brown. The centers should still be soft.
- Don't Overbake: Overbaking will result in dry, crumbly cookies. Keep an eye on them; ovens vary.
- Cooling: Allow the cookies to cool on the baking sheet for about 5 minutes before carefully transferring them to a wire rack to cool completely. This allows them to set up without breaking.
Once cooled, a light dusting of powdered sugar adds a beautiful finish and an extra touch of sweetness.
Make-Ahead Magic and Storage Secrets
One of the many charms of a great thumbprint cookie recipe is its make-ahead potential. Whether you're planning for a holiday cookie exchange or just want to have fresh cookies on demand, these tips will serve you well.
- Dough Storage: The cookie dough can be made ahead and stored. Wrap the entire dough log tightly in plastic wrap (or a plastic-free alternative) and seal it in a zip-top bag. It can be refrigerated for up to 3-4 days or frozen for up to 3 months.
- Freezing Pre-Rolled Dough: For ultimate convenience, you can roll the dough into balls, sugar-coat them, and even make the indentations (without filling) before freezing. Arrange the balls on a parchment-lined tray and freeze until solid, then transfer them to a freezer-safe bag.
- Baking from Frozen: When ready to bake, allow frozen dough (either as a whole or pre-rolled balls) to soften at room temperature until pliable enough to work with. If baking pre-rolled, frozen balls, you may need to add a few extra minutes to the baking time.
- Storing Baked Cookies: Once baked and completely cooled, thumbprint cookies are best kept in an airtight container at room temperature. They will maintain their freshness and soft texture for up to 5 days. For more detailed insights on preparing and storing your favorite cookies, explore our guide: Buttery, Fruity & Easy: Your Make-Ahead Thumbprint Cookie Guide.
Conclusion
Baking perfect thumbprint cookies doesn't have to be a gamble. By understanding the role of butter temperature, mastering the gentle art of indentation, and being mindful of your filling quantity, you can consistently achieve beautiful, soft, and perfectly shaped cookies that defy the dreaded "spreading thin" phenomenon. This comprehensive thumbprint cookie recipe, coupled with our expert tips, ensures that your next batch will be nothing short of spectacular. So go ahead, gather your ingredients, and bake with confidence. Your perfectly formed, deliciously filled thumbprint cookies await!
