Buttery, Fruity & Easy: Your Make-Ahead Thumbprint Cookie Guide
There's something uniquely comforting about a classic cookie, and few treats capture that nostalgic charm quite like the humble thumbprint cookie. Imagine a tender, buttery shortbread-like base, perfectly cradling a vibrant dollop of fruity sweetness. These delightful bites are not just a feast for the eyes and palate; they're also incredibly easy to make and, perhaps best of all, perfectly suited for making ahead – a true gift for any busy baker. Whether you're preparing for a holiday gathering, a cozy afternoon tea, or simply craving a sweet escape, our comprehensive guide to the ultimate thumbprint cookie recipe will ensure your baking success.
From the foundational ingredients that promise a melt-in-your-mouth texture to expert tips on achieving that ideal shape and preventing common baking woes, we'll walk you through everything you need to know. We'll even delve into the intriguing world of lilikoi (passion fruit) butter, a unique and incredibly delicious filling that elevates this classic to new heights of flavor. Get ready to discover your new favorite make-ahead dessert!
The Anatomy of a Perfect Thumbprint Cookie
While seemingly simple, a truly great thumbprint cookie balances several key elements. Understanding these components is the first step to mastering this beloved treat.
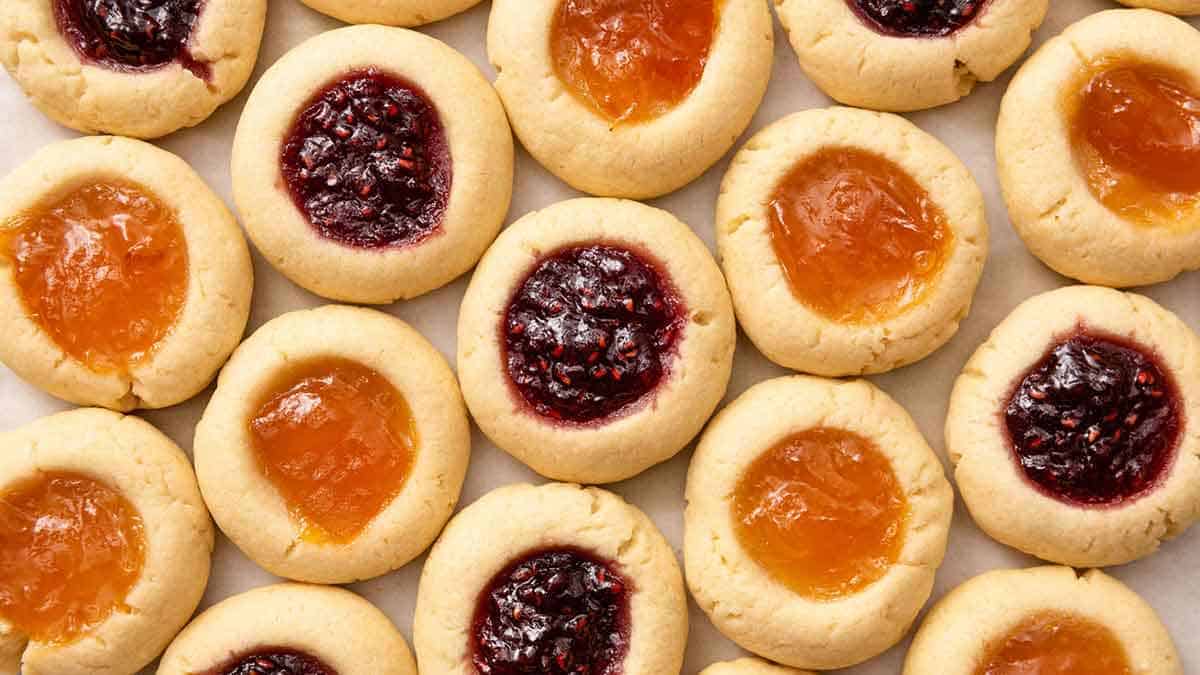
- The Buttery Base: At its heart, a thumbprint cookie is built upon a rich, tender, and slightly crumbly shortbread-style dough. The quality of your butter is paramount here. Using unsalted butter allows you to control the overall saltiness, ensuring a balanced flavor profile. Room temperature butter is crucial for proper creaming with sugar, resulting in a light and airy dough that b'akes up beautifully. A touch of vanilla extract and a pinch of salt further enhance the buttery goodness, creating a foundational flavor that perfectly complements the fruity filling.
- The Fruity Filling: This is where the cookie gets its distinctive "thumbprint" and its burst of flavor. Traditionally, thumbprint cookies are filled with a dollop of jam or preserves. The beauty lies in the endless customization possibilities. However, a standout option gaining popularity is lilikoi (passion fruit) butter. This vibrant filling offers a delightful balance of tartness and sweetness, with a smooth, rich texture that truly sets it apart. The slightly exotic tang of lilikoi beautifully cuts through the richness of the buttery cookie base, creating a truly unforgettable experience.
- Structural Integrity: The characteristic indentation, usually made with a thumb or the back of a small spoon, needs to be just right. Too deep, and your cookie might flatten excessively; too shallow, and you won't have enough room for that delicious filling. The goal is a delicate balance that allows the cookie to hold its shape while providing a perfect nest for the jam. Proper dough consistency and careful handling before baking are key to preventing the cookies from spreading too thinly or losing their form.
Crafting Your Ideal Thumbprint Cookie Recipe: Step-by-Step
Ready to bake? This thumbprint cookie recipe simplifies the process, making it accessible for bakers of all levels. We'll focus on the exquisite lilikoi butter variation, but feel free to substitute with your favorite jam.
Essential Ingredients:
- Unsalted Butter: 1 cup (2 sticks), softened to room temperature. This is crucial for a smooth, homogenous dough.
- Granulated Sugar: ½ cup, for sweetness and crispness.
- Large Egg: 1, helps bind the dough and adds richness.
- Vanilla Extract: 1 teaspoon. For the best flavor, consider making your own vanilla extract or using a high-quality store-bought version.
- All-Purpose Flour: 2 cups. For accurate measurement, spoon the flour into your measuring cup and level it off with a flat knife.
- Baking Powder: ½ teaspoon. Provides a slight lift, contributing to a tender crumb.
- Salt: ¼ teaspoon. Balances the sweetness and enhances all other flavors.
- Lilikoi Butter: Approximately ½ cup. You can use homemade lilikoi butter for an unparalleled experience, or a good quality store-bought brand. (If using jam, aim for a thicker preserve rather than a runny jelly).
- Optional: Additional granulated sugar for rolling the cookie dough balls, powdered sugar for dusting.
Detailed Baking Instructions:
- Prepare Your Workspace: Preheat your oven to 350°F (175°C). Line a baking sheet with parchment paper to prevent sticking and ensure even browning. Set aside.
- Cream Butter and Sugar: In a large mixing bowl, using a handheld or stand mixer, whip the softened unsalted butter and granulated sugar together until the mixture is light, fluffy, and well incorporated. This usually takes 2-3 minutes.
- Add Wet Ingredients: Beat in the egg and vanilla extract until just combined. Scrape down the sides of the bowl to ensure everything is fully mixed.
- Incorporate Dry Ingredients: In a separate small bowl, whisk together the all-purpose flour, baking powder, and salt. Gradually add the dry ingredient mixture to the wet ingredients, mixing on low speed until *just* combined. Be careful not to overmix, as this can lead to tough cookies.
- Form the Cookies: Scoop out approximately 1 tablespoon of dough for each cookie. If desired, gently roll each portion into a smooth ball in additional granulated sugar for a sparkling finish and a slight crunch. Place the dough balls onto your prepared baking sheet, leaving about 1-2 inches between each to allow for slight spreading.
- Create the Indentation: Using the back of a round teaspoon (or your thumb, if you prefer), gently press a shallow well into the center of each cookie dough ball. The key is to create an indentation that is deep enough to hold the filling but not so deep that it pushes through to the bottom of the cookie, which can cause it to flatten too much during baking.
- Fill with Lilikoi Butter: Carefully spoon about 1 teaspoon of lilikoi butter (or your chosen jam) into each indentation. Avoid overfilling, as this can cause the filling to bubble over or make the cookies flatten out.
- Bake to Perfection: Bake for 12-15 minutes, or until the edges of the cookies are lightly golden brown. The centers should still look soft but set.
- Cool and Serve: Remove the cookies from the oven and let them cool on the baking sheet for 5 minutes before transferring them to a wire rack to cool completely. Once cooled, you can dust them with a fine sprinkle of powdered sugar for an elegant finish.
Expert Tips for Thumbprint Cookie Success:
- Butter Temperature is Key: Ensure your butter is truly at room temperature – soft enough to indent easily but not melted or greasy. Overly soft butter can contribute to cookies spreading too thinly.
- Measure Flour Correctly: Always spoon and level your flour, rather than scooping directly with the measuring cup, to prevent adding too much, which can make cookies dry and dense.
- Don't Overmix: Mix the dry ingredients into the wet until *just* combined. Overmixing develops gluten, leading to tougher cookies.
- Shallow Indentations: As mentioned, a shallow well is crucial. If you push too deep, the cookie's structure is compromised, leading to flattening. For evenness, use the back of a round measuring spoon.
- Mind the Filling: No more than 1 teaspoon of filling per cookie. Too much can cause spillage and also contribute to flattening.
- Parchment Paper Power: Don't skip the parchment paper! It prevents sticking, aids in even baking, and makes cleanup a breeze.
For even more detailed guidance on preventing spreading and other common issues, check out our article: Perfect Thumbprint Cookies: Tips to Prevent Spreading Thin.
Mastering the Make-Ahead Magic & Storage
One of the most appealing aspects of this thumbprint cookie recipe is its make-ahead potential, making it a perfect choice for holiday baking or simply having a delicious treat ready at a moment's notice.
- Make-Ahead Dough:
- Refrigeration: You can prepare the cookie dough and chill it in the refrigerator for up to 2-3 days. Wrap the dough tightly in plastic wrap (or your preferred plastic-free alternative) to prevent it from drying out. When ready to bake, let the dough soften slightly at room temperature for about 15-20 minutes before rolling and shaping.
- Freezing Dough (Whole): For longer storage, wrap the entire dough ball tightly in plastic wrap, then place it in a freezer-safe zip-top bag. It will keep well in the freezer for up to 2-3 months. Thaw overnight in the refrigerator, then let it come to room temperature before baking.
- Freezing Dough (Pre-Rolled Balls): For ultimate convenience, roll the dough into individual balls as instructed in the recipe, but don't make the indentations or add the filling yet. Place the balls on a parchment-lined baking sheet and freeze until solid (about 1-2 hours). Once frozen, transfer them to a freezer-safe zip-top bag. They can be stored for up to 2-3 months. When ready to bake, you can bake them from frozen (adding a few extra minutes to the baking time), or let them soften slightly at room temperature before making the indentations and filling.
- Storing Baked Cookies:
- Baked and filled thumbprint cookies are best stored in an airtight container at room temperature. They will maintain their freshness and deliciousness for up to 5 days.
- If you live in a warm, humid climate or are concerned about the freshness of your filling, you can store them in the refrigerator, though this may slightly alter the cookie's texture.
- Freezing Baked Cookies:
- If you want to freeze baked cookies, it's often best to freeze them *before* filling them. Once thawed, you can then add your fresh jam or lilikoi butter.
- However, fully baked and filled cookies can also be frozen. Place them in a single layer on a baking sheet to freeze solid, then transfer them to an airtight freezer-safe container, separating layers with parchment paper. Thaw at room temperature.
Beyond the Basics: Customization and Flavor Variations
While the lilikoi butter thumbprint cookie is a star in its own right, the beauty of this thumbprint cookie recipe lies in its adaptability. Don't hesitate to experiment!
- Endless Filling Possibilities:
- Classic Jams: Raspberry, apricot, strawberry, blueberry, or cherry preserves are timeless choices.
- Citrus Curds: Lemon curd, lime curd, or even orange curd offer a bright, zesty contrast.
- Chocolate & Caramel: A dollop of melted chocolate ganache, Nutella, or a chewy caramel sauce can transform these into a decadent treat.
- Nut Butters: A small amount of almond butter or peanut butter (perhaps topped with a jelly!) can add a different dimension.
- Dough Enhancements:
- Citrus Zest: Add a teaspoon of lemon, orange, or lime zest to the dough for an aromatic lift.
- Extracts: Swap some vanilla for almond extract, peppermint extract (especially for holidays), or coconut extract.
- Spices: A pinch of cinnamon, nutmeg, or cardamom can add warmth to the cookie base.
- Nutty Roll: Before making the indentation, roll the cookie dough balls in finely chopped nuts (like pecans, walnuts, or almonds) for added texture and flavor.
- Garnishes:
- A dusting of powdered sugar (as mentioned).
- A light drizzle of contrasting glaze (e.g., a lemon glaze over raspberry jam).
- Sprinkle with toasted shredded coconut or a delicate edible glitter.
If you're particularly keen on trying the featured lilikoi butter version, explore our dedicated guide: Easy Lilikoi Butter Thumbprint Cookies: A Classic Treat.
Conclusion
The thumbprint cookie, with its charming appearance and irresistible combination of buttery and fruity flavors, truly stands out as a timeless classic. Our comprehensive thumbprint cookie recipe, emphasizing ease and make-ahead convenience, ensures that you can enjoy these delightful treats whenever the craving strikes. Whether you opt for the vibrant tang of lilikoi butter, a beloved classic jam, or venture into your own creative flavor combinations, these cookies are guaranteed to bring joy to any occasion. So, gather your ingredients, roll up your sleeves, and get ready to bake a batch of buttery, fruity goodness that's as easy as it is delicious!
